Shave ice is around 90% ice, so it makes sense that the quality of ice is extremely important if you want real melt-in-your mouth shave ice in all its glory. Sure, anybody can freeze some ice cubes, but the process through which shaved ice is made plays a big role in making the best possible shaved ice. This means you have to freeze your ice properly, but it also means you will have to temper your ice properly to obtain optimal texture right before you shave it. In this article, we will give some tips and tricks on how to properly temper the ice for your shaved ice dessert.
You shouldn’t ever use ice directly out of a freezer to make shave ice. If you do, it will make a powder, dull your blade, and also put excessive wear on your machine. Instead, you first have to “temper” the ice to get it ready.
What is Tempering?
In Physics, tempering refers to the process of reducing some of the excess hardness of a material, and this is done by heating the material to some temperature. While the term tempering is usually used to describe working with metals, it’s the same basic process for ice.
If the ice is too cold, it will be too hard and brittle and will not stick together properly – resulting in an ice powder that’s not ideal for holding flavor. To remove some of the excess hardness, the ice needs to temper so that it can soften and shave correctly.
How To Temper Ice For Shave Ice
To temper your block ice, remove it from the freezer 10-15 minutes before shaving. When the ice starts to sweat and melt on the outside surface, move it to a chest type ice cooler to maintain the temperature between 18 and 20 degrees Fahrenheit. The softer the ice is, the better quality your shave ice will be. The sweating of the ice blocks means that ice has reached the tempered stage and is ready to be used.
If your ice block gets too warm, either while in the cooler or during the tempering process the ice will become clumpy and will not hold flavor well. If this happens, you can place the ice back into the freezer to refreeze it.
Tempering is a process that needs a little bit of experience and practice. As you continue to get a feel for it, the process of tempering ice gets easier and easier.
Let’s Review
Tempering ice includes a few simple steps, but it’s well worth the time, and will ultimately make a world of difference in how your shaved ice turns out. Let’s see the most important steps for tempering your ice block.
[dropcap]1[/dropcap] Remove the ice block from the freezer roughly 10 to 15 minutes before shaving. The larger the block is, the more time it’s going to take to temper properly. [dropcap]2[/dropcap] Place your block ice in a 5-gallon bucket, baking pan, or restaurant tray to keep water from the melted ice from making a slippery mess. [dropcap]3[/dropcap] Once the ice block begins to melt (also known as sweating) on the outside surfaces, you can place the block into chest-style, ice coolers to maintain the temperature. This will keep the ice at the best temperature and act as a staging area.Shaving The Ice
Now that your ice is properly tempered to the right hardness, it’s time to start shaving!
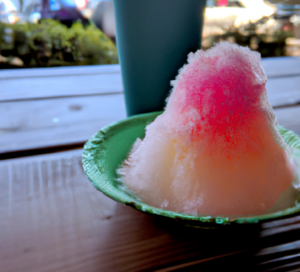
As you shave, slowly rotate the cup or container and guide the snow into the bowl or cup with your hand. Don’t squeeze the air out of the snow! This will make a snow cone type of serving! As you rotate the cup, you are shaping the snow until you get the desired size. Try to make the serving around 2 to 3 inches above the cup. Some people use a funnel to shape the top of the snow. That can be OK as long as you don’t squeeze the air out.
To flavor the serving, start on the sides and rotate upward to the top. It takes a little practice to make sure you are getting enough flavoring. Perfect shave ice is when the snow has flavor throughout the serving but not a puddle at the bottom. One other thing – hold the pour bottle by the neck. You have more control if you hold the syrup bootle by the barrel.
Cubed or Block Ice?
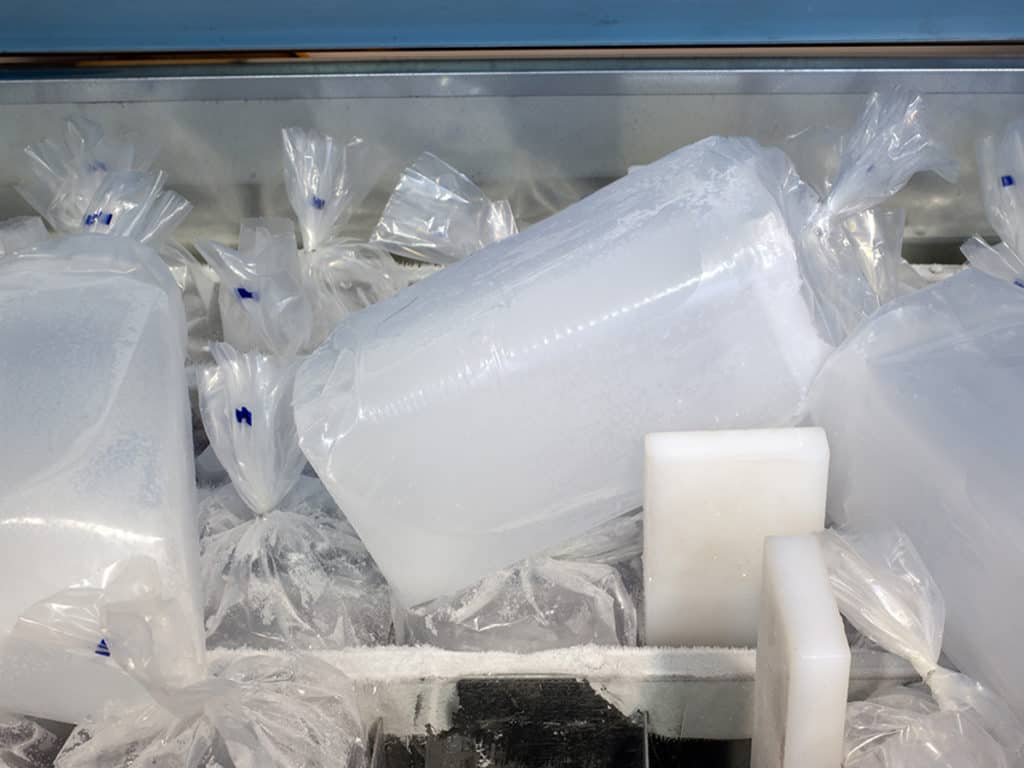
First, let’s make clear which of these two types of ice is the best for shaved ice dessert. The texture difference of snow from the block and cubed ice is evident. Block ice shavers make the best possible ice, that’s truly snow-like in texture. Snow cones are made of cubed ice and are more available and easier to make. And the cost is pretty low. For snow cone machines that use cube ice, tempering is not always necessary. On the other hand, block ice is not as easily available as regular cubed ice. You may be able to buy it from a wholesaler, or you can make it on your own using ice molds.
Block ice comes in two different forms—solid and compressed block ice. We don’t recommend using compressed block ice with shaved ice machines, as it doesn’t provide a smooth shaving surface and in turn, will not produce smooth snow that solid block ice would. Compressed block ice consists of chunks of ice that are forced into a compression mold. Because of the nature of this process, air gets trapped inside the final block of ice, which can cause uneven shaving.
When solid block ice is adequately tempered, the snow evenly catches the flavoring within the texture – instead of accumulating at the bottom as a snow cone does. The snow can break apart, if not adequately tempered before being shaved. The process of tempering is a simple and necessary step.
[callout type=”center” title=”Hydrating with water alone is boring” message=”Buy a shave ice machine and start having more fun!” button_text=”View Our Shave Ice Machine Buying Guide” href=”https://happyshaveice.com/best-shave-ice-machines-for-home/”]