Most natural snow cone syrups are made from combining a mixture of fresh fruits, water, and sugar (or other natural sweetener) and then boiling it down to a syrup consistency. For that reason, this same very basic recipe can be used to create a syrup from most fruits. If there’s a fruit that you really love, making syrups from them is a great way to explore different possibilities. You might also consider trying different blends of fruits and also mixing in different herbs like mint that might compliment the flavor.
No matter which ingredients you choose, it’s important to make sure you let your syrup reduce to the proper thickness. The liquid needs to be thick enough to adhere to the ice without quickly melting and diluting it.
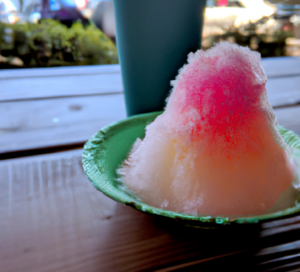
Creating Shave Ice and Snow Cone Syrups From Fresh Fruit
The quantities for the ingredients below are more of a guide and can be adjusted based on how strong you like your syrup and which fruit you’re using. The amount of shave ice or snow cones this makes will also vary a lot depending on how big your syrup pours and ice servings are.
Ingredients
2 cups of granulated sugar (or other sweetener)
2 cups of water
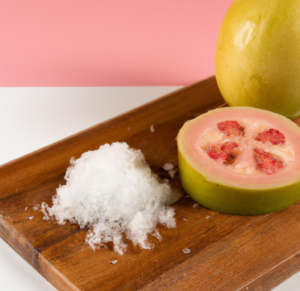
2 cups fresh diced fruit
Preparation
- You’ll have to first wash and chop your fruits before adding to a sauce pot. Depending on the fruit, you may want to remove any skins or seeds, as these can sometimes impart an unwanted bitter flavor.
- Next, add in the sugar and water and heat on medium until sugar dissolves. Keep stirring periodically to avoid burning the sugar or fruit.
- Heat the mixture over medium heat for 10-15 minutes until syrup starts to thicken and some of the residual moisture from the fruits is reduced. As the syrup is reducing, continually mash the fruit with a mashing tool to make sure there are no big chunks.
- Keep stirring over heat until it is thickened down to a good syrup-like consistency, and then remove from the heat and allow the mix to cool down to room temperature.
- Once cooled, you can strain the syrup into a bowl to remove the fruit pulp, or use it as it is. If you plan on dispensing the syrup from a squeeze bottle, you might prefer straining the pulp since it can sometimes clog the nozzle tip.
Some Useful Tips and Tricks For Homemade All Natural Shave Ice Syrup
- Your saucepan should be 3x larger than the mixture because the syrup will expand during cooking.
- Always make sure to keep the liquids cold before pouring over ice, to ensure the ice stays frosty and compact while the syrup makes its way to the bottom of the bowl or cup. If you melt the ice too much, you’ll just have a fruity drink instead of deliciously flavored ice.
- Although it may seem like the recipes call for a lot of sweetener, remember that you’ll be heavily diluting these syrups by pouring them over ice. If you don’t make them sweet enough, the flavor of the finished dessert will be mild.
- The snow cone syrup must boil enough to reduce and thicken. If it’s not thickened enough, reheat the syrup and let it simmer until syrup thickens.
- You can store your homemade all natural syrup in the fridge for up to 2 months (or longer if you add a preservative like citric acid).
- The quantity of syrup depends on how long you boil the syrup. In general, 2-3 cups of syrup cover 10-30 snow cones depending on their size. The usual ratio is 2-3 tablespoons per cup of shaved ice.
- Make sure you don’t forget to stir the syrup while it’s cooking or you might burn it and get a weird aftertaste.